Documentation
Movement and Keybindings
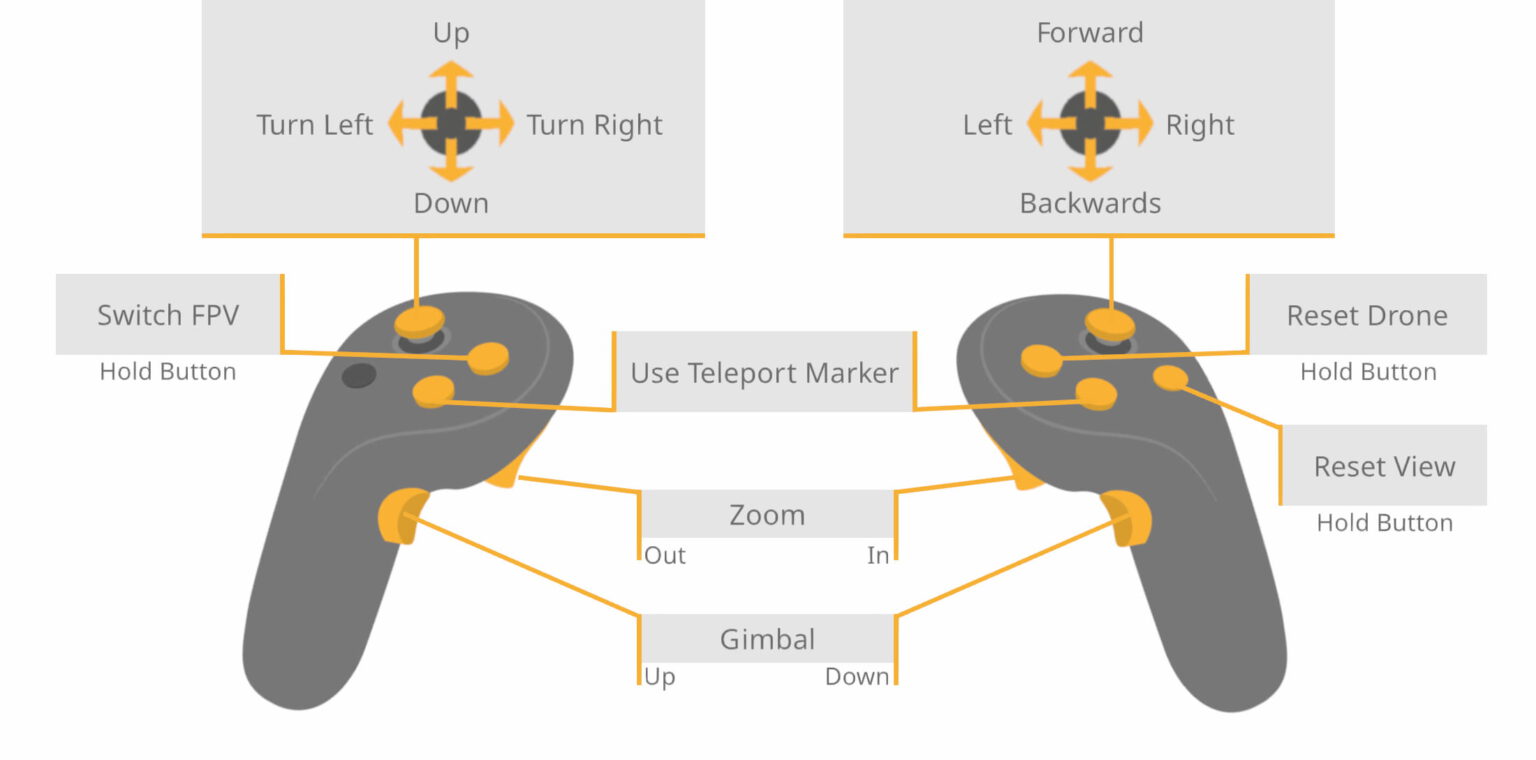
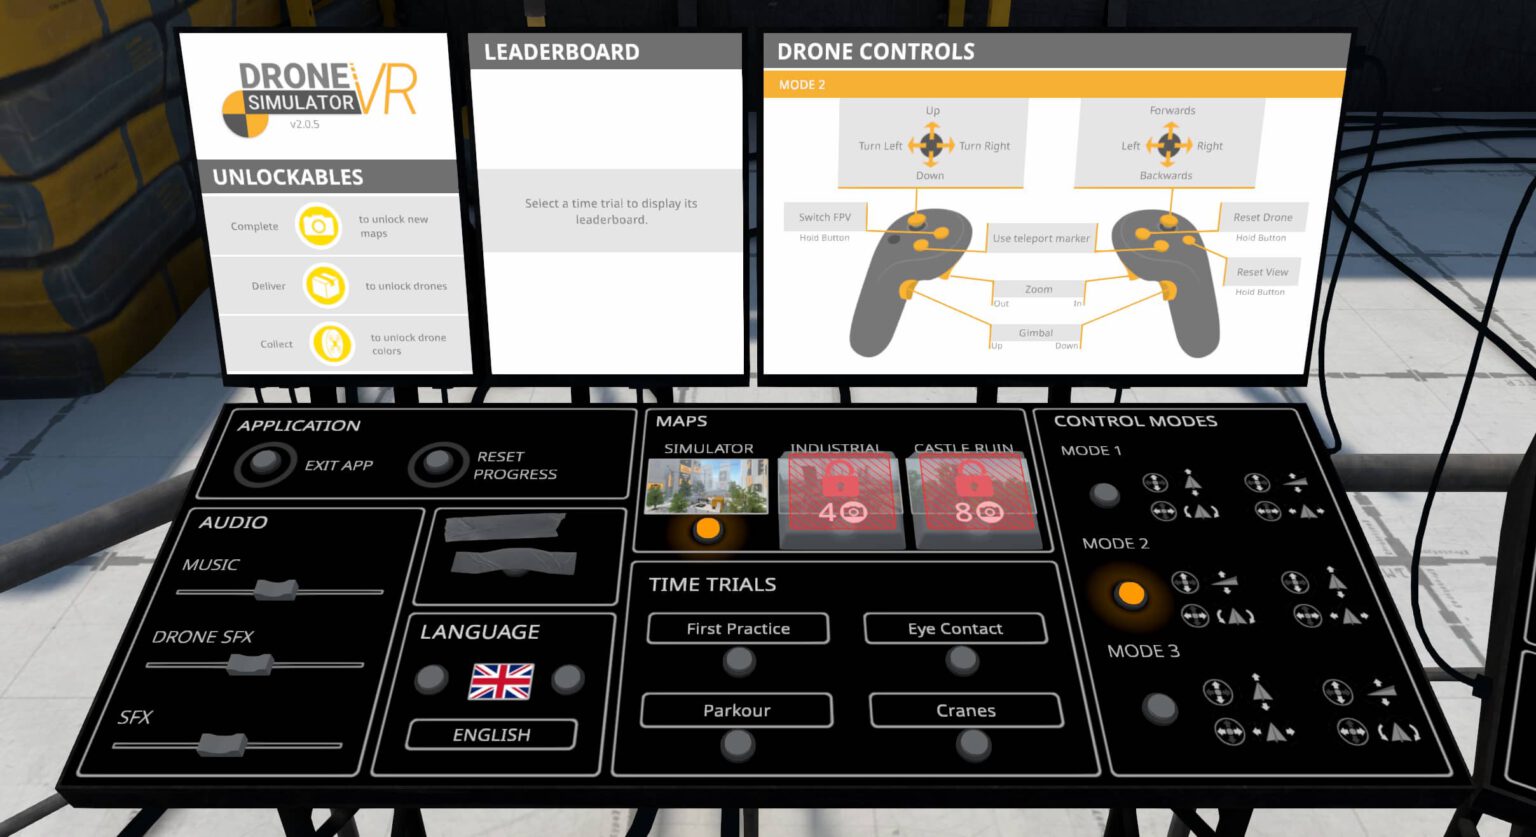
The user can adjust the control mode, which changes the function of the joysticks, via the control panel. The graphic is available in different control modes, but the one shown currently has Mode 2 active, as it is the default setting.
Downstream Monitor
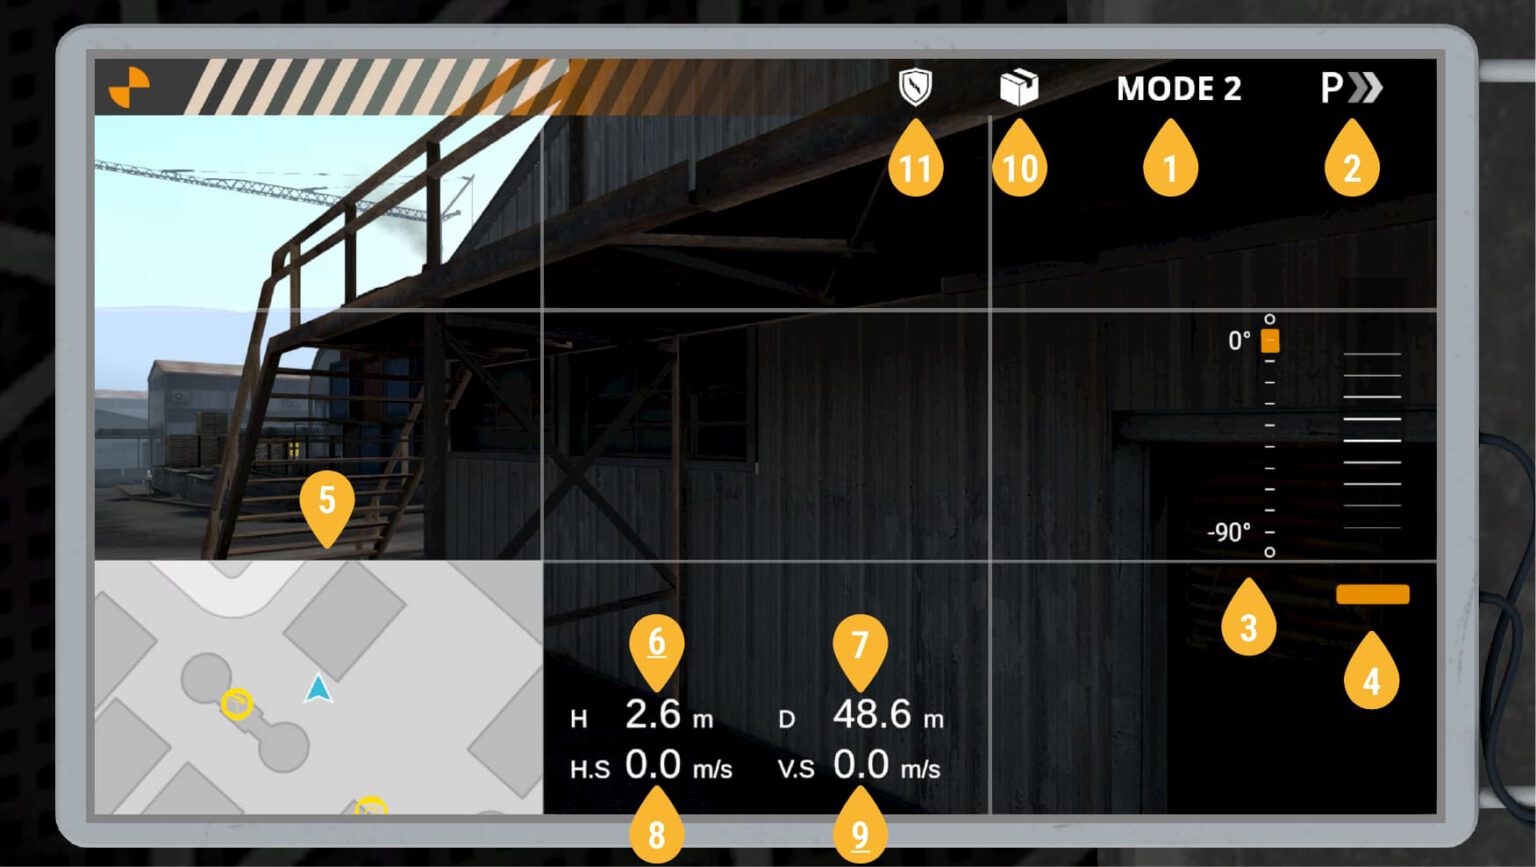
The downstream monitor is attached to a tablet located on the right virtual controller. It displays the image from the camera mounted on the drone’s gimbal.
1. Control Mode
2. Flight Mode
3. Gimbal Angle
4. Zoom Factor
5. Minimap
6. Altitude Indicator
7. Distance to Starting Point
8. Horizontal Speed
9. Vertical Speed
10. Package Attached Indicator
11. Protector Active Indicator
First-Person-Mode
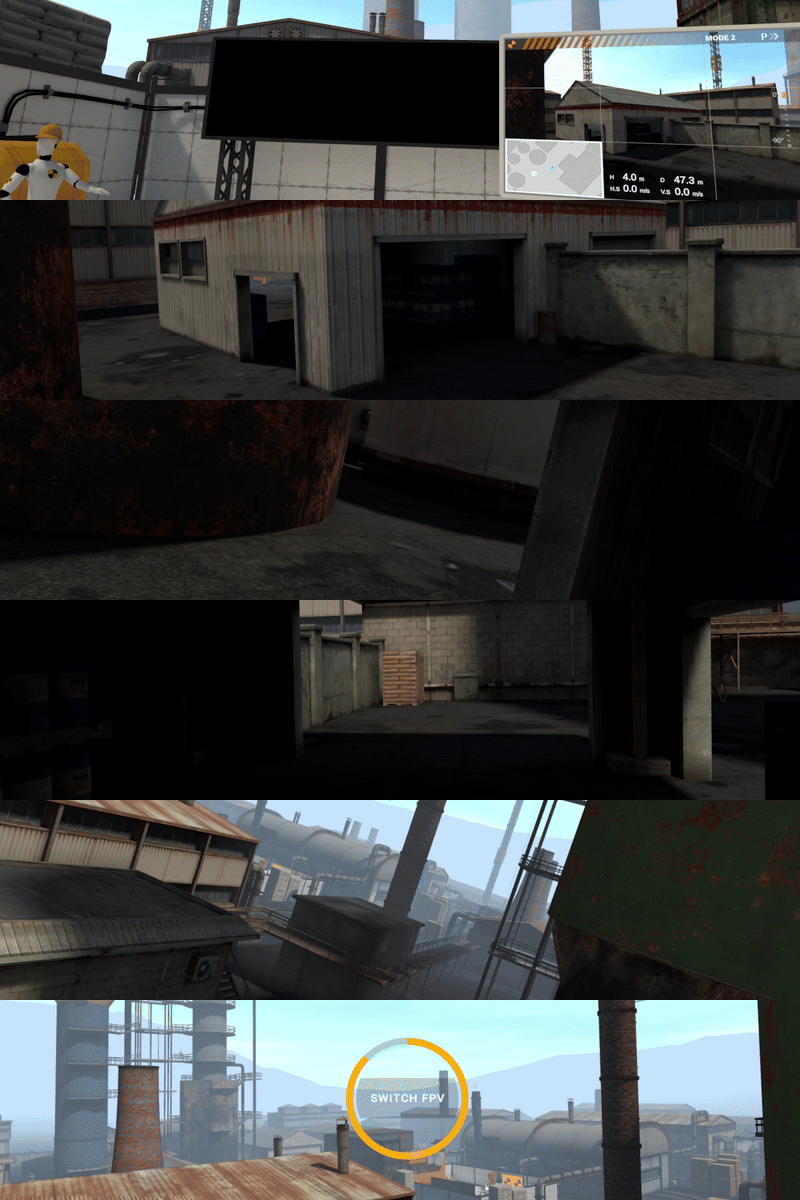
The user can switch to the drone’s first-person view by holding the primary button on the left controller for about two seconds. The same input or the destruction of the drone will exit the first-person mode.
To operate the control panel, the user must exit FPV mode. However, all other functions remain available while in FPV mode.
Overview
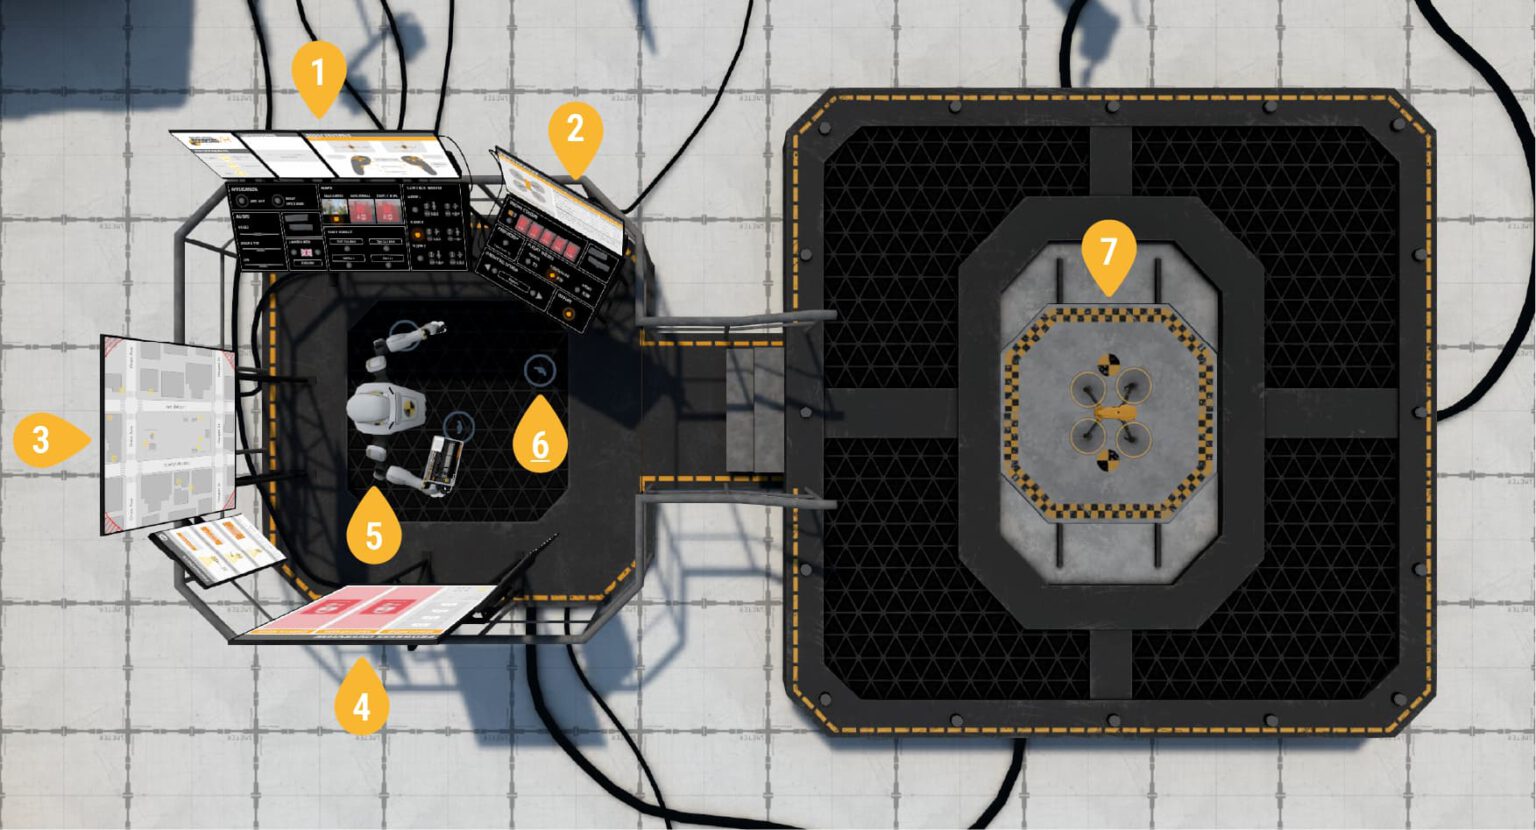
The user is always constrained to the platform on the left. From there, they can interact with the control panel, track their progress across various environments, view the drone’s location on the map, and maintain a clear view of both the hangar and the drone itself. After a collision or a reset, a new drone is automatically provided from the hangar.
1. Application Control Panel
2. Drone Control Panel
3. Minimap
4. Progress Overview
5. User Avatar
6. Teleport Marker
7. Drone Hangar
Application Control Panel
All settings and functions can be controlled via the control panel. When the user moves one of their virtual hands near the panel, an extended index finger automatically appears for interaction. This finger can be used to interact with buttons and sliders to operate the control panel.
Application:
- Exit App: Closes the application. To prevent accidental activation, the button must be held down for a short time before the app closes.
- Reset Progress: Resets all challenge progress, including Photospots, Package Delivery Missions, and Collectibles. Any unlocked content, such as drones, maps, or drone colors, remains permanently unlocked.
Audio:
Audio settings can be adjusted using sliders. Background music volume, drone sound effects and environmental sounds can each be controlled separately.
Drone Color:
Drone colors unlocked during gameplay (by collecting collectables) can be selected here.
Language:
The application language can be changed at any time from this menu. The interface updates immediately, allowing users to switch between all available languages without restarting the application.
Maps:
Maps are unlocked by discovering photospots. The user can choose between Simulator, Industrial and Castle Ruin as the active map.
Time Trials:
The user can select one of the four time trials available for the active map. The start checkpoint of the selected time trial is located near the user area and is shown on the minimap. The race is canceled when the same button is pressed again or the drone has crashed.
Leaderboard:
The leaderboard displays the best times of users worldwide. The user’s own best time is highlighted in yellow and always visible. Times achieved by friends are marked in green and are also shown permanently.
Control Modes:
Mode 1: Alternative control mode
Mode 2: Standard mode for camera drones
Mode 3: Commonly used in racing drones
Drone Control Panel
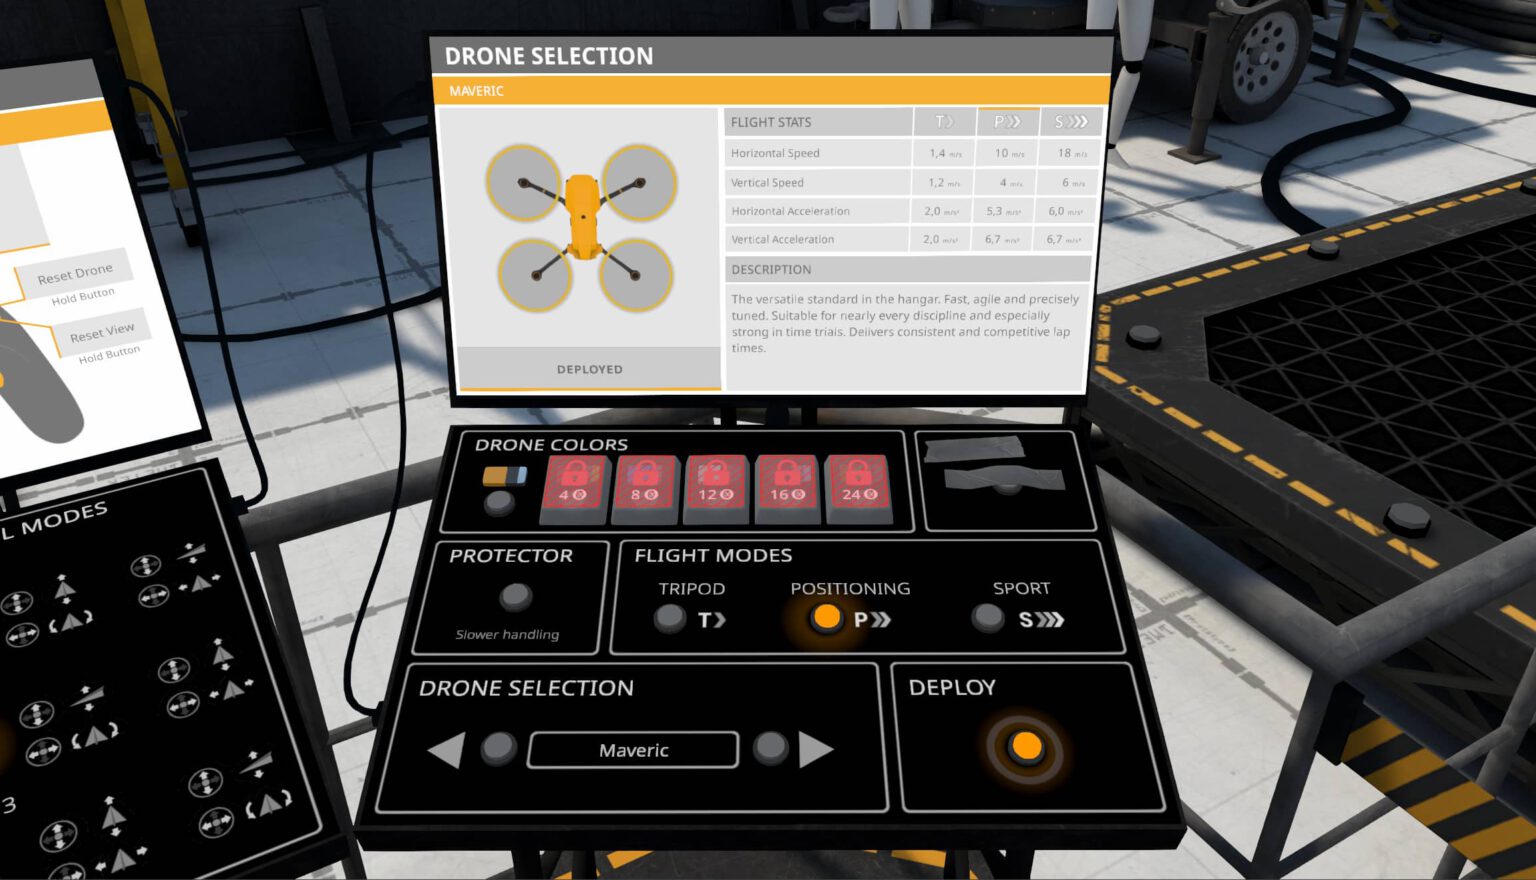
The Drone Control Panel provides quick access to the most important drone-specific settings. It is used to prepare the drone for the flight and gives the user a compact overview of the currently selected drone setup.
Drone Color:
Drone colors unlocked during gameplay can be selected here.
Protector:
The protector toggles the drone’s prop guards. With prop guards enabled, the drone is easier and safer to handle, but reacts more slowly.
Flight Modes:
Tripod: Slow but precise control (perfect for photospots)
Positioning: Medium speed with good control (Default)
Sport: Maximum speed (perfect for setting time trial records)
Drone Selection:
The user can switch between available drone models. The display shows the selected drone with its flight stats, description and current unlock state.
Deploy:
The selected drone can be deployed from the hangar. The panel shows whether the drone is already deployed, ready to deploy or still locked.
Progress Overview
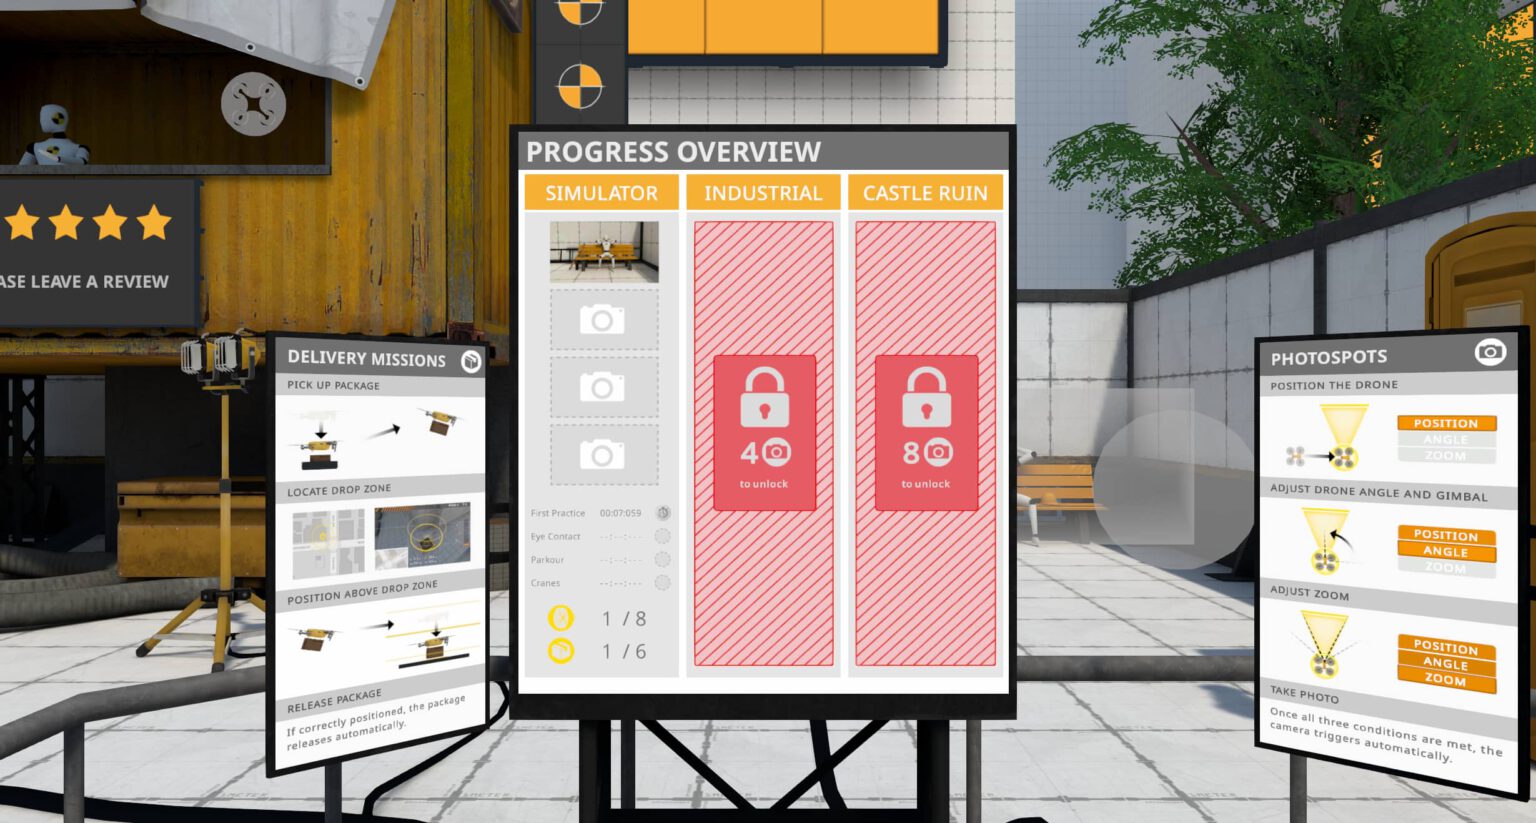
The progress overview displays what the user has already achieved.
The display is divided into three vertical columns, one for each map. Each column contains four slots for photos. Once a photospot is completed, the corresponding photo appears in the slot.
Below, the user’s best times in the time trials and the medals earned for them are shown. At the very bottom, there is an overview of how many collectables have already been gathered and how many packages have been delivered in the respective environment.
At the start, only the left column is visible. The remaining columns are unlocked once the corresponding environments have been accessed.
Minimap
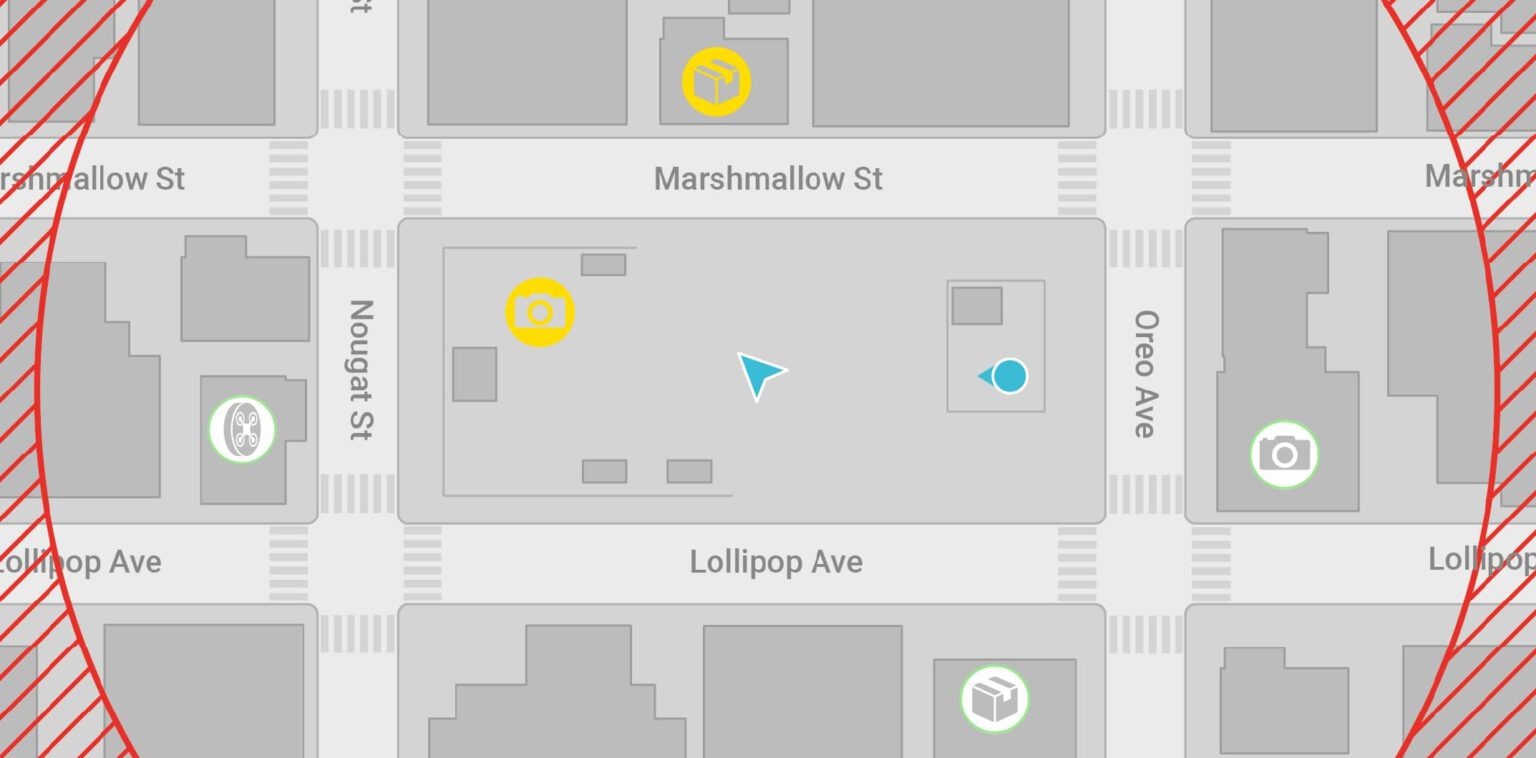
The minimap displays all relevant positions in real time. Collectables only become visible after they have been collected.
Legend:
Drone Position
User Postition
Photospot
Completed Photospot
Collected Collectable
Package Drop Zone
Completed Package Drop Zone
Photospots
By completing photospots, additional environments are unlocked. There are four in each map.
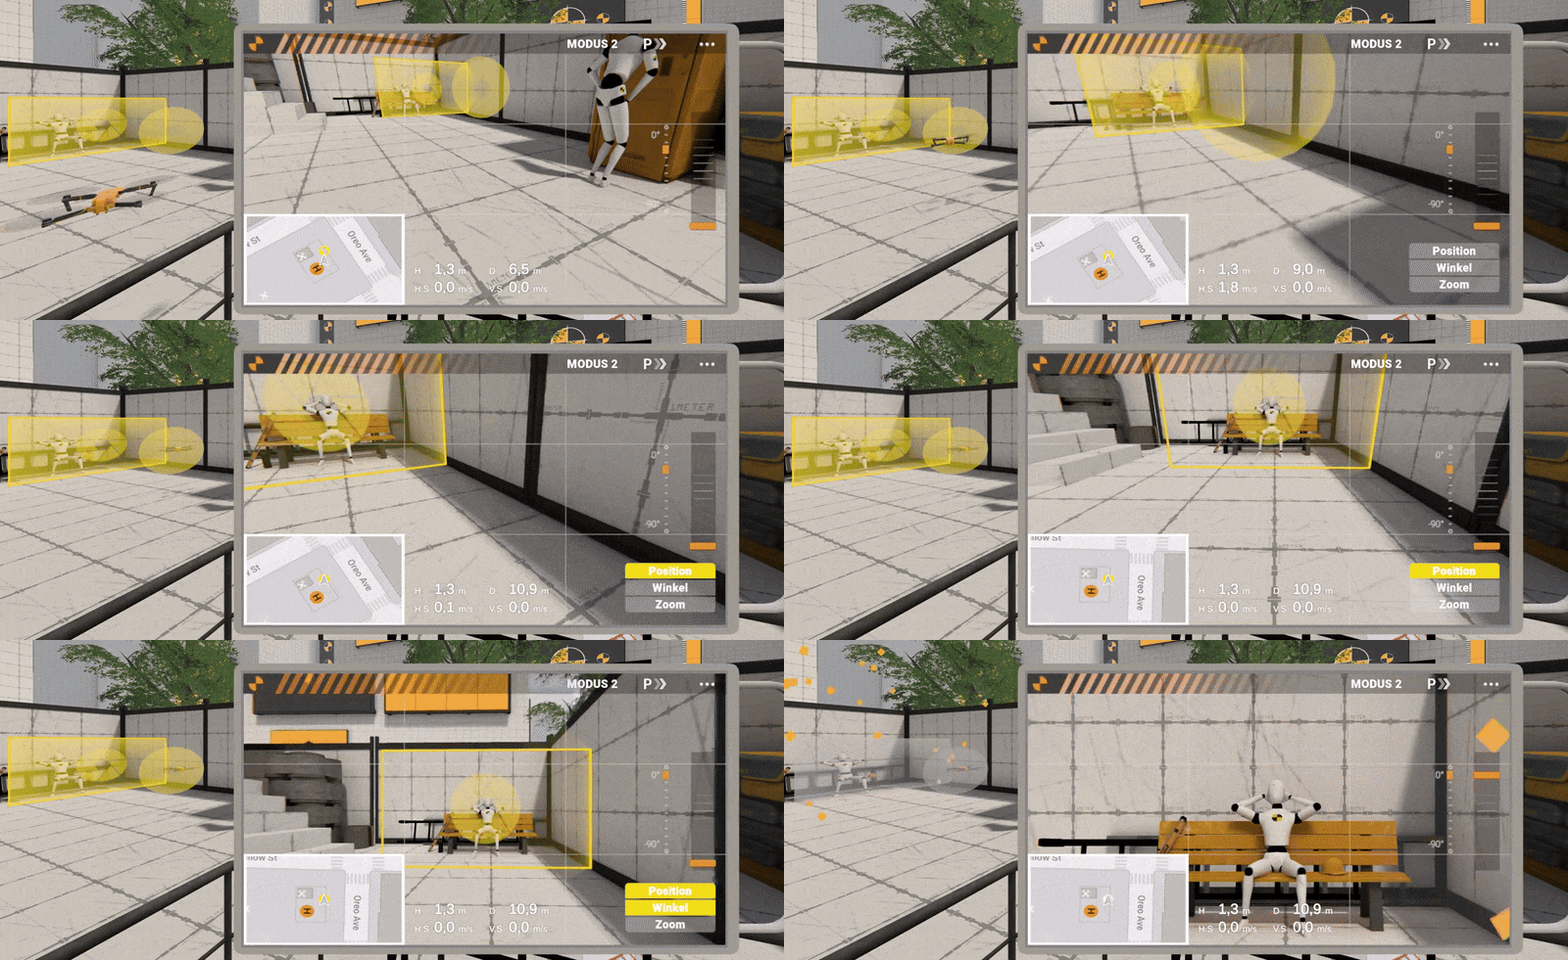
When the drone approaches a photospot, a small table appears. It shows which of the three required factors have been fulfilled by lighting up yellow.
Position: The drone must be positioned within the yellow sphere, as close to the center as possible.
Angle: The camera is adjusted horizontally by rotating the drone and vertically via the gimbal.
Zoom: The zoom level must be set so that the visible section of the image exactly matches the frame of the photospot.
Once all three factors are correctly set, all fields in the table light up simultaneously, and the photo is taken automatically. Once four photospots in a map have been completed, the next map is unlocked.
Package Delivery
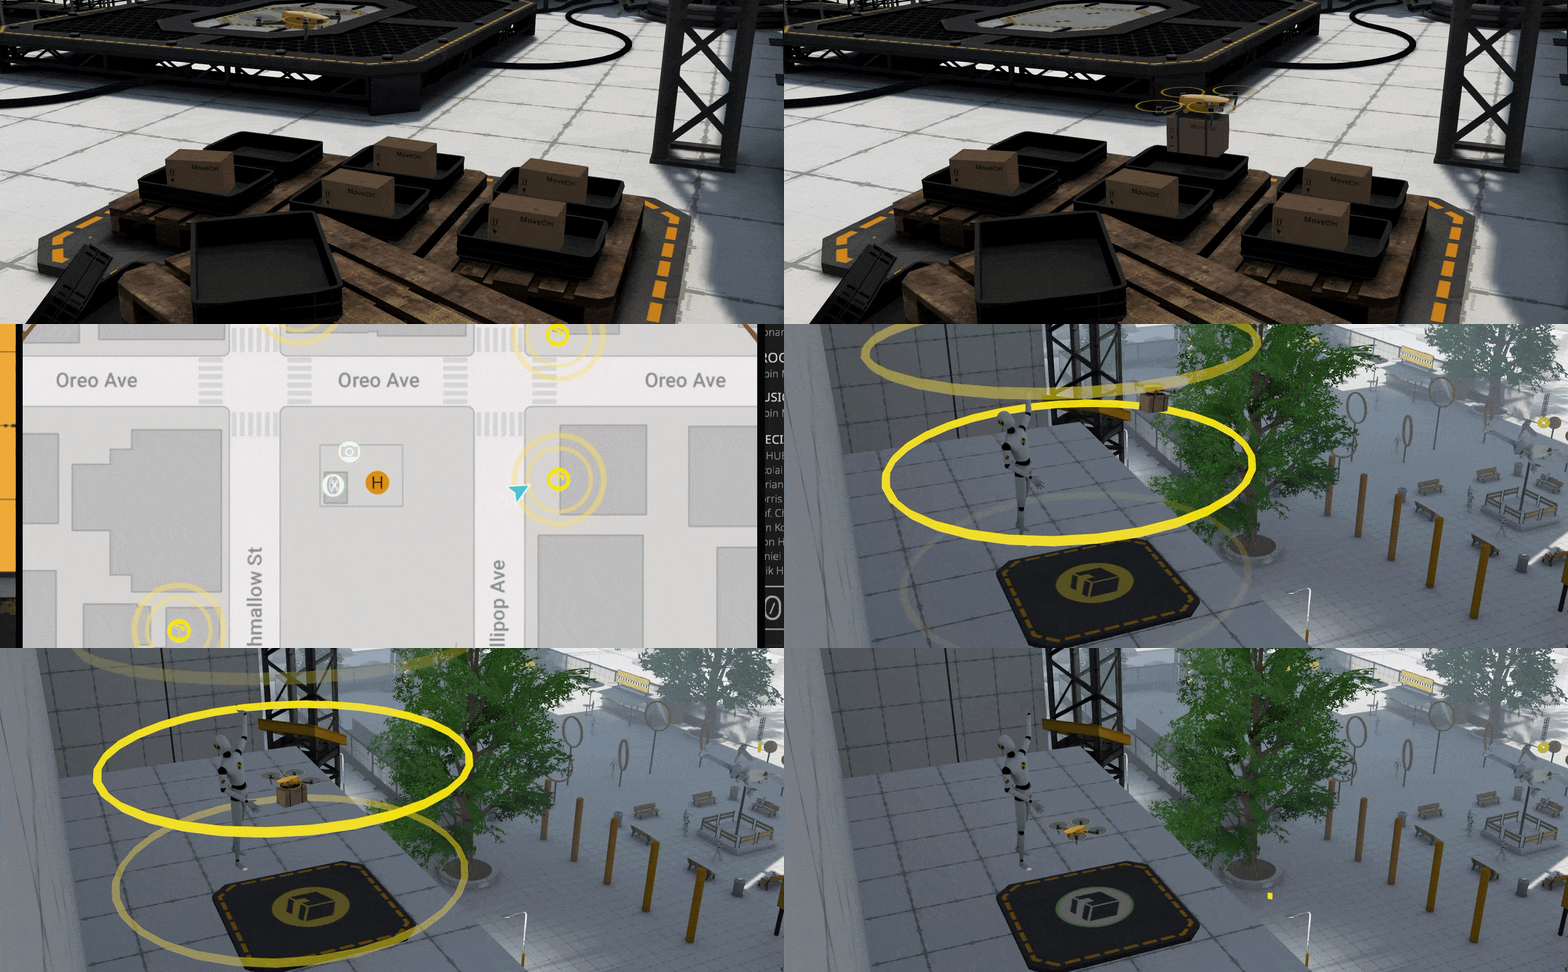
By completing delivery missions, additional drones can be unlocked. Delivered packages are also shown in the progress overview.
A delivery mission starts when the drone picks up a package. The package is attached to the drone and must be transported to the marked drop zone.
The delivery process is divided into four steps:
Pick up package: The drone must fly close to the package pickup area to collect the package.
Locate drop zone: After the package has been picked up, the target drop zone becomes the next objective and is shown to the user.
Position above drop zone: The drone must be carefully positioned above the drop zone while carrying the package.
Release package: If the drone is correctly positioned, the package releases automatically and the delivery is completed.
If the package collides with the environment before it is delivered, the delivery attempt fails and the package respawns.
Collectables
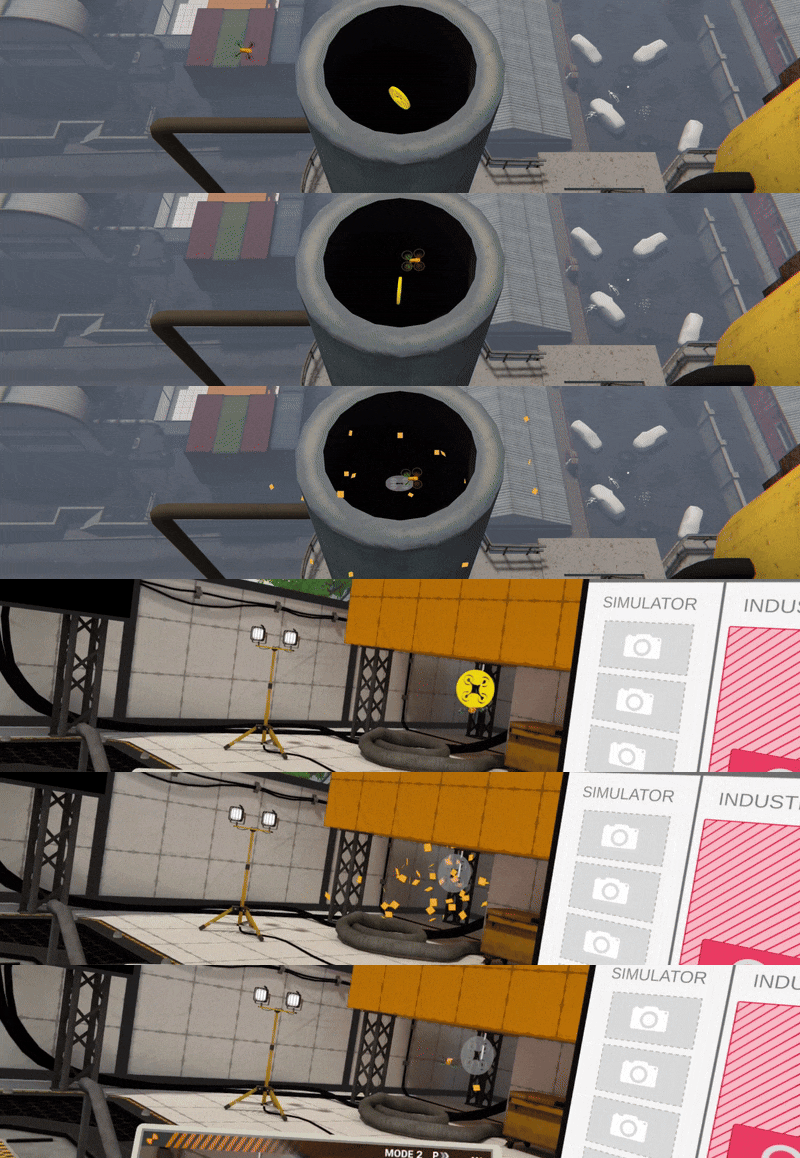
Each map contains eight hidden collectables that are collected by touching them with the drone. For every four collectables gathered, an additional drone color is unlocked.
Collectables that have already been picked up are greyed out and cannot be collected again.
Time Trials
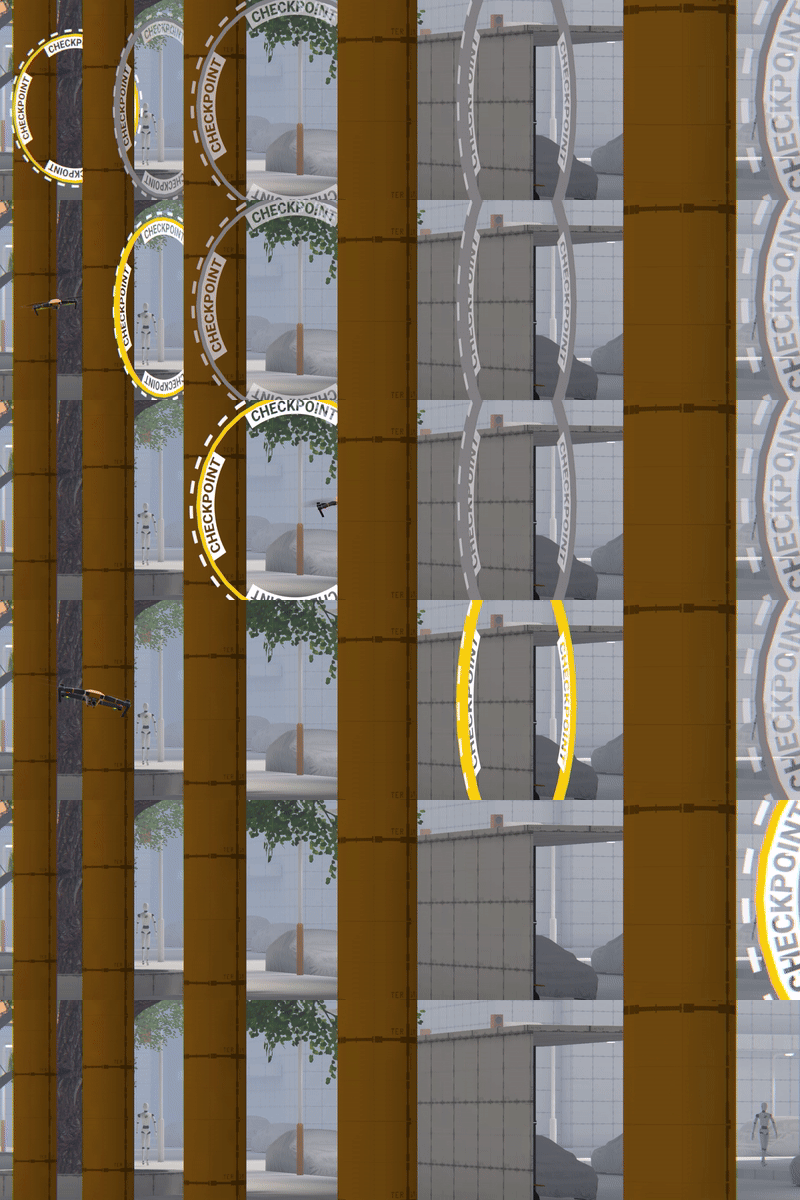
Each map offers four different time trials with the goal of flying through all checkpoints in the given order as quickly as possible.
The currently active checkpoint, which must be passed next, is highlighted with a yellow ring. All checkpoints are also visible on the minimap.
If the drone is destroyed during the race, the time trial ends automatically. After resetting the drone, the race can be restarted by flying through the start checkpoint again.
The user can abort the active time trial by pressing the highlighted button again.
Still questions?
Reach out to us for support, feedback, or collaboration. We’ll get back to you shortly.
You can reach us at info@0space-studios.com